⚡ Storm or Roof Damage? Get a FREE Estimate
Text ESTIMATE to (844) 907-2546
Or call (800) 792-0212 for 24/7 emergency response
AI-powered • No obligation • Licensed IL & WI
Welcome to our comprehensive guide on strengthening roofs for increased disaster resistance. In this blog, we’ll delve into essential strategies recommended by the Insurance Institute for Building and Home Safety (IBHS) to fortify roofs against high winds, hurricanes, and other severe weather events. With small breaches in roofs posing significant risks to homes during storms, it’s crucial for builders to implement robust measures. We’ll explore the three key steps advocated by the IBHS’s Fortified Roof program: “Nail it down,” “Seal it up,” and “Lock it in.” Whether you’re a homeowner or a builder, this guide will equip you with actionable insights to safeguard your property against potential damage.
Scope:
- Enhance a new home’s resilience against high winds, hurricanes, tornadoes, and earthquakes during the roofing process.
- Secure existing sheathing with additional fasteners, meeting IBHS Fortified Home Program standards.
- Opt for fully adhered roof membrane or compatible tape to seal roof deck joints effectively.
- Ensure robustness by installing metal drip edges at eaves and gable rake edges.
- Select certified roof attic vents resistant to wind, rain, snow, and embers, aligning with Florida Building Code TAS 100 (A).
- Adhere to IBHS Fortified Roof program guidelines for installation and material selection, optimizing disaster resistance.
Description:
- Focus on three main steps advised by IBHS’s Fortified Roof program:
- “Nail it down”: Secure plywood or OSB sheathing with recommended nail fastener spacing.
- “Seal it up”: Apply a fully adhered roof membrane or seal sheathing joints with compatible tape.
- “Lock it in”: Install metal drip edges at eaves and gable rake edges.
- These steps ensure the roof’s robustness, crucial for minimizing damage during storms.
Structural Attachment (“Nail it Down”)
- Utilize minimum thickness 7/16 in. plywood or OSB sheathing.
- Secure with 8d ring-shank nails as per IBHS recommendations.
- Structural Attachment (“Nail it Down”):
- IBHS recommends a minimum of 7/16 in. plywood or OSB for roof sheathing.
- Deck attachment specifics:
- Use 8d ring-shank nails.
- Space nails at 4 inches on center within 4 feet of roof edges and each side of the ridge.
- Space nails at 6 inches on center throughout the rest of the roof.
- IBHS favors plywood roof sheathing over OSB (Fortified Home Hurricane Standards).
- Refer to IBHS sheathing details for hurricane areas for further specifications.
Seal the Deck (“Tape it Up”)
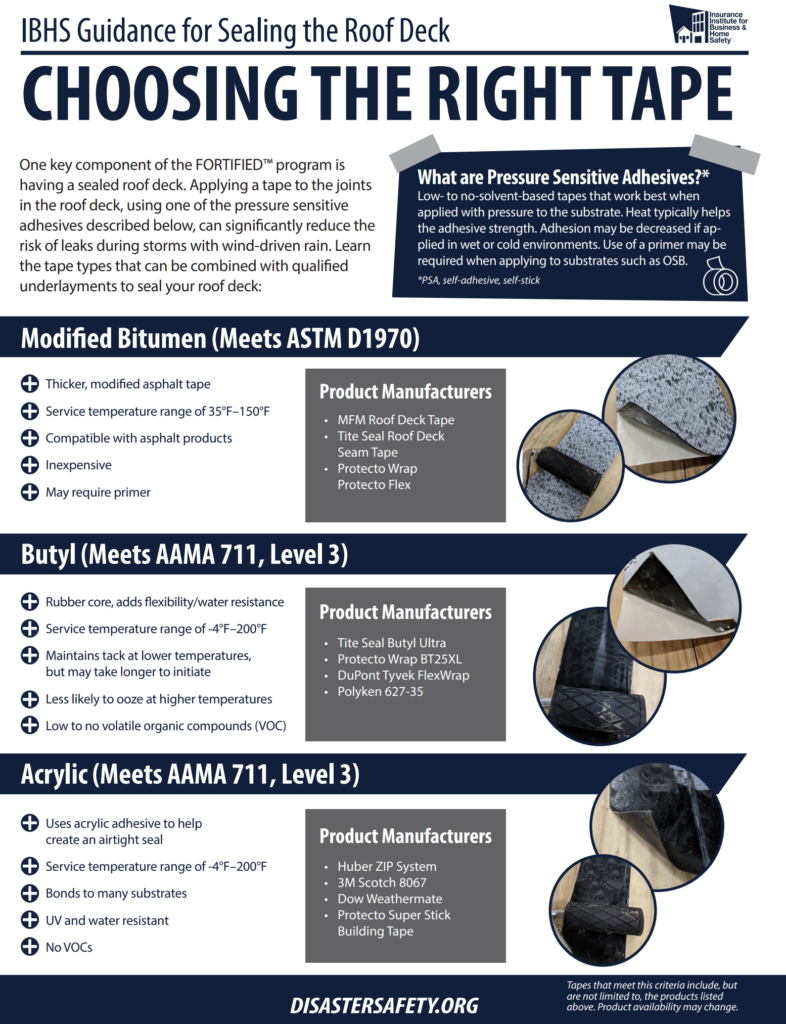
- Choose from three IBHS-approved methods for sealing the roof deck.
- Options include self-adhering membranes or flashing tape with compatible underlayment.
- Seal the Deck Options:
- Cover the entire roof deck with self-adhering polymer-modified bitumen membrane, recommended by IBHS. Add #15 felt if asphalt shingles will be installed.
- Tape horizontal and vertical joints in roof sheathing panels with approved, self-adhering flashing tape. Cover with code-compliant ASTM D226 Type II or ASTM D4869 Type III or IV building felt or approved synthetic underlayment.
- Alternatively, cover the roof decking with two layers of 30# building felt.
- High-Wind Zone Recommendations:
- In high-wind zones, Building America suggests using fully adhered roof membrane as a second line of defense. Seal roof deck sheathing joints with compatible flashing tape or membrane strips.
- Refer to IBHS Fortified Home guidelines for tape and membrane selection in sealing the roof deck.
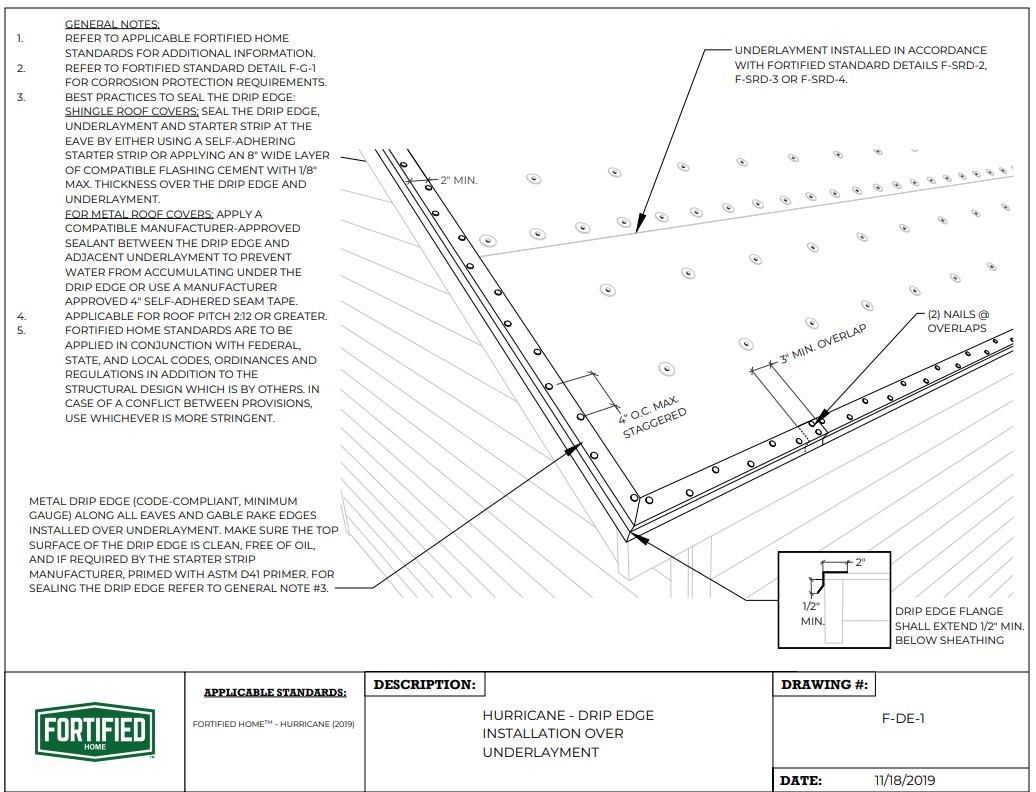
Eaves and Gable Rake Edges (“Lock it In”)
- Install code-compliant metal drip edges at eaves and gable rake edges.
- Ensure proper overlap and mechanical fastening for maximum effectiveness.
Eaves and Gable Rake Edges Requirements:
- In high-wind zones, install drip edges at roof eaves and gable rake edges.
- Requirements:
- Use code-compliant metal drip edges, meeting minimum gauge requirements.
- Ensure a minimum 3-inch overlap at joints.
- Eave drip edges should extend at least ½ inch below the sheathing and overlap the top of the roof sheathing edge by at least 2 inches.
- Mechanically fasten drip edge to the roof deck, with fasteners compatible with flashing, spaced no more than 4 inches apart.
- Installation Notes:
- Drip edges at eaves can be installed over fully adhered membrane underlayment if sealed with flashing cement.
- Drip edges at rakes should also be installed over fully adhered membrane underlayment.
Other Considerations:
- Flashing: Employ proper flashing to prevent water and wind intrusion at critical points.
- Venting: Select wind and water-resistant roof attic vents, especially in high-wind zones.
- Roof Claddings: Choose roofing materials rated for high wind and hail resistance.
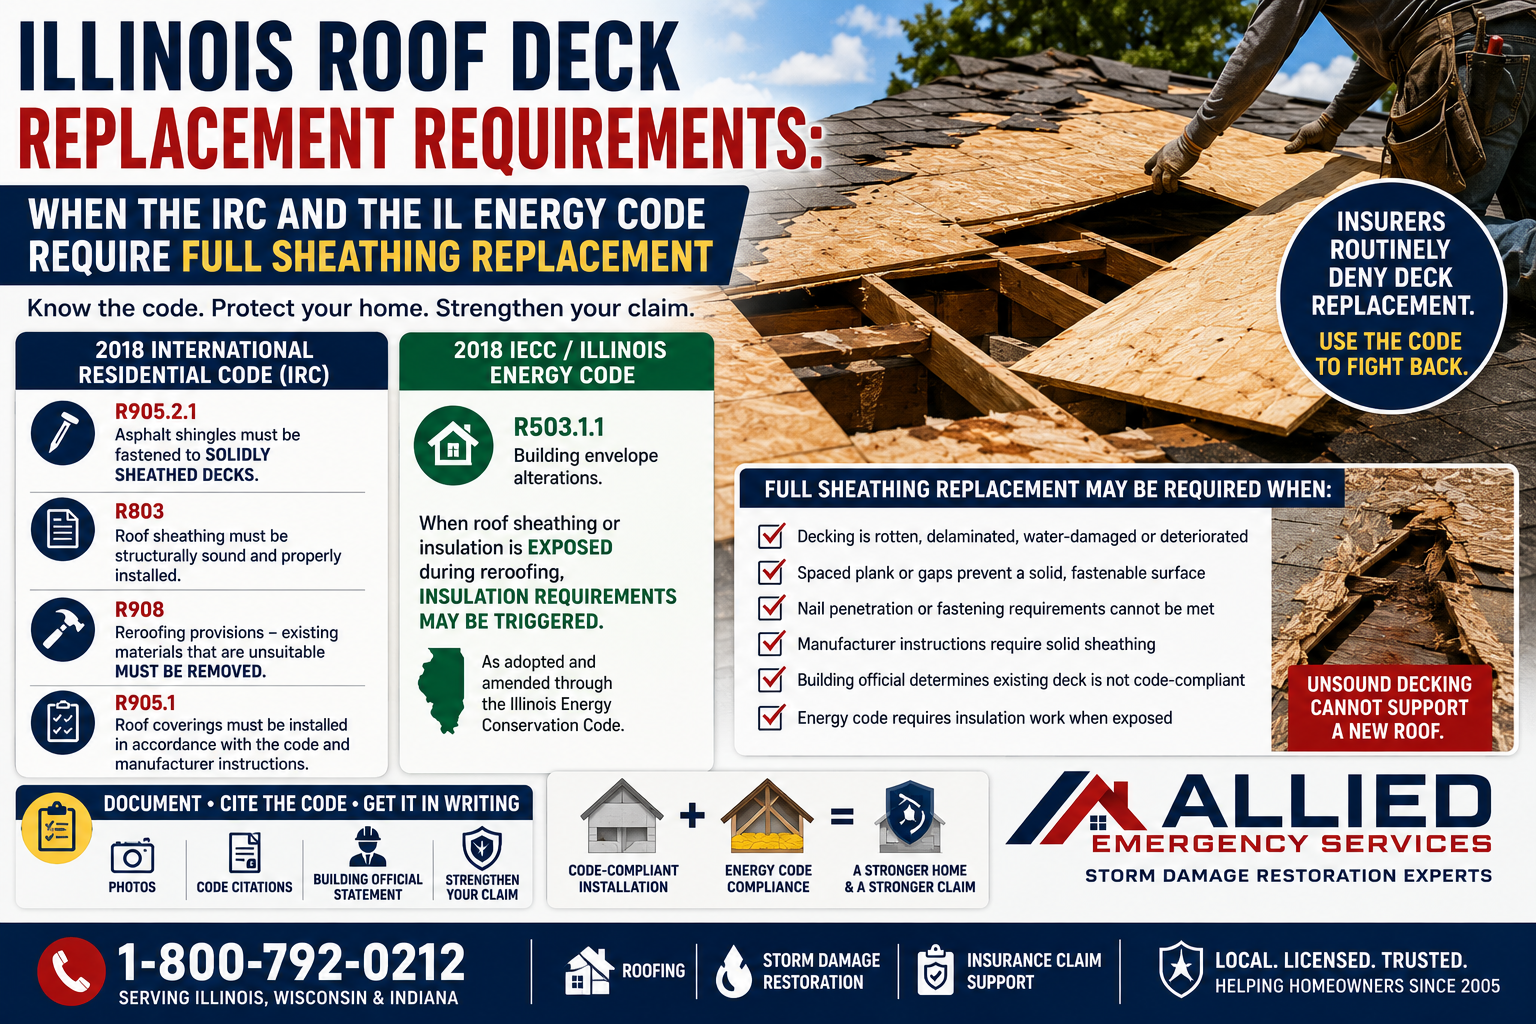
Re-Roofing:
- Strengthen existing homes against high winds and stormwater entry during re-roofing.
- Inspect and replace damaged materials, secure sheathing with additional fasteners, and consider alternative methods for older roof decks.
Ensuring Success:
- Follow IBHS Fortified Home program guidelines for optimal roof deck installation.
- Implement additional measures like asphalt shingle starter strips and proper soffit assembly construction.
Compliance with Codes and Standards
- Compliance with ENERGY STAR Single-Family New Homes (Version 3/3.1, Rev. 11) (National Water Management System Builder Requirements):
- Refer to ENERGY STAR Single-Family New Homes, Version 3/3.1 (Rev. 11).
- Compliance with DOE Zero Energy Ready Home (Revision 07) (Exhibit 1 Mandatory Requirements):
- Exhibit 1, Item 1: Certified under the ENERGY STAR Qualified Homes Program or the ENERGY STAR Multifamily New Construction Program.
- Exhibit 1, Item 6: Certified under EPA Indoor airPLUS.
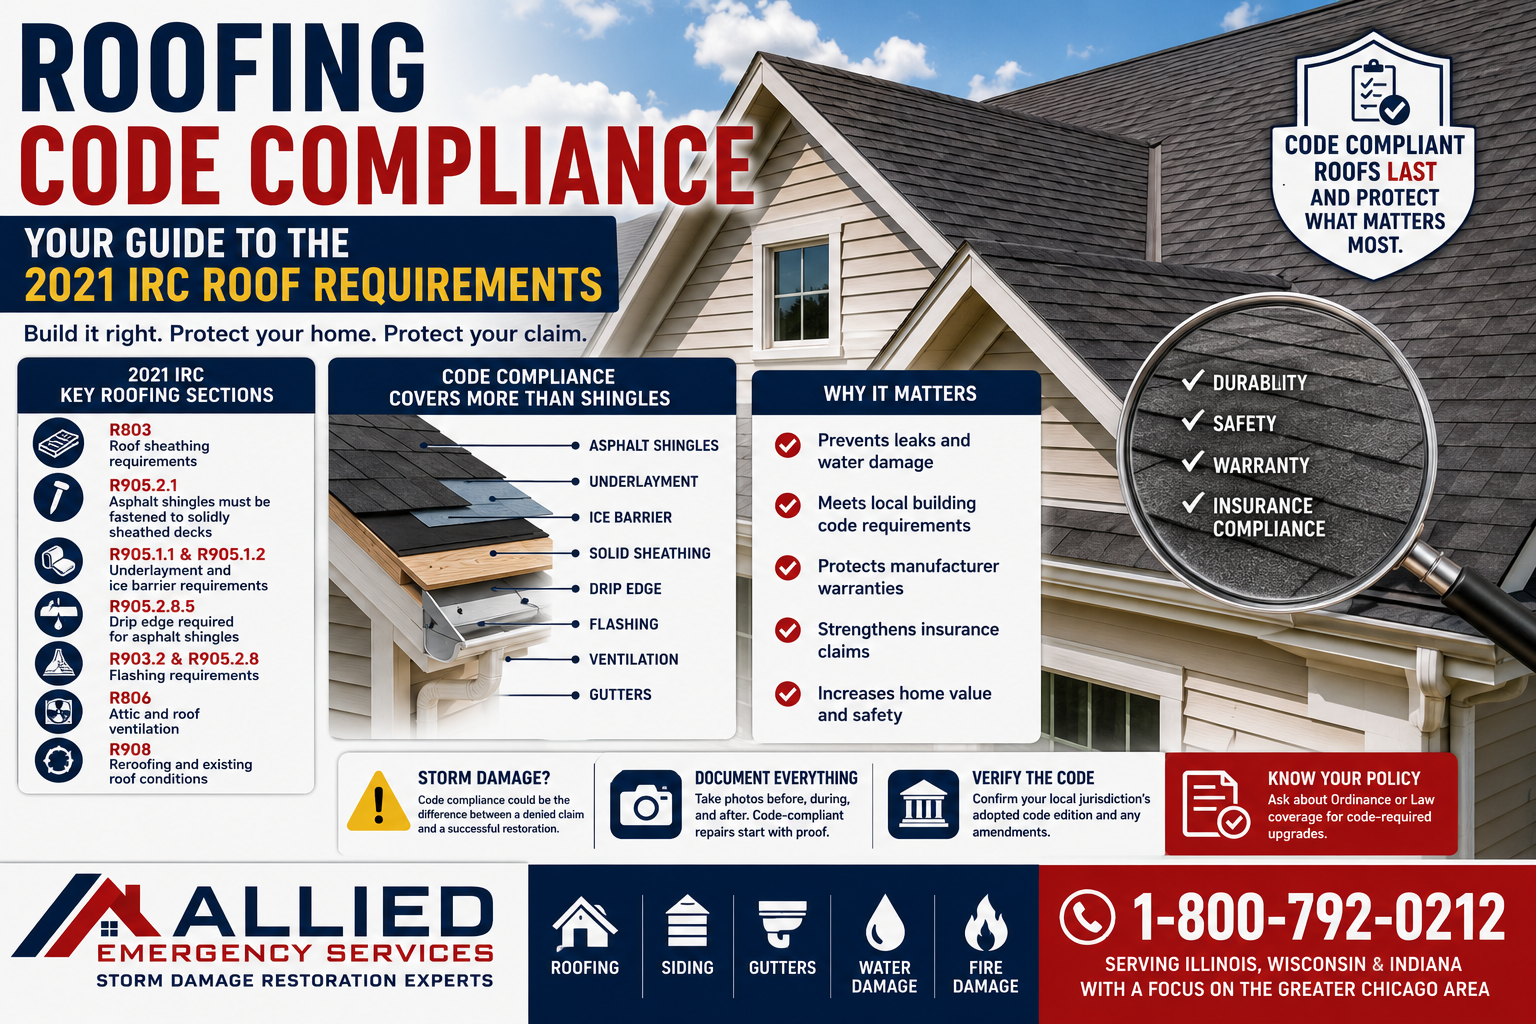
- Compliance with 2018 and 2021 International Residential Code (IRC):
- 2018 IRC R301.2.1 Wind design criteria.
- 2018 IRC Table R301.2(1).
- 2018 IRC Figure R301.2(5)A.
- 2018 IRC Table R301.2(2).
- 2018 IRC Table R301.2(3).
- 2018 IRC Section R102.7.1 Additions, alterations, or repairs.
- Retrofit: 2009, 2012, 2015, 2018, and 2021 IRC (Section R102.7.1):
- Refer to the applicable code version for retrofit provisions.
- Appendix J of the IRC:
- Refer to the relevant sections of Appendix J for regulations on repair, renovation, alteration, and reconstruction of existing buildings.
By adhering to these guidelines, homeowners can fortify their roofs, reducing vulnerability to severe weather events and enhancing overall structural resilience.
In conclusion, fortifying roofs is paramount in mitigating the devastating effects of storms and severe weather conditions. By adhering to the guidelines outlined by the IBHS’s Fortified Roof program and complying with relevant codes and standards such as ENERGY STAR and the International Residential Code (IRC), builders can enhance the resilience of homes against natural disasters. From structural attachment to sealing techniques and drip edge installation, every aspect plays a crucial role in bolstering roof strength. As we strive to build safer and more resilient communities, prioritizing robust roofing practices is essential for ensuring the long-term safety and protection of homes and their occupants.
For immediate service or consultation, you may contact us at Allied Emergency Services, INC.
Contact Information:
- Phone: 1-800-792-0212
- Email: Info@AlliedEmergencyServices.com
- Location: Serving Illinois, Wisconsin, and Indiana with a focus on the greater Chicago area.
If you require immediate assistance or have specific questions, our human support is readily available to help you.
Disclaimer: This article is intended for informational purposes only. For professional advice, consult experts in the field.
⚡ Need Storm Damage Help? We Serve 155+ Cities
Allied Emergency Services provides 24/7 emergency restoration across Illinois, Wisconsin, Indiana, and Michigan. Text ESTIMATE to (844) 907-2546 for a free estimate in minutes.
Top service areas: Chicago • Naperville • Aurora • Kankakee • Joliet • Rockford • Schaumburg • Milwaukee • Madison • We’re Hiring!
⚡ Storm or Roof Damage? Get a FREE Estimate
Text ESTIMATE to (844) 907-2546
Or call (800) 792-0212 for 24/7 emergency response
AI-powered • No obligation • Licensed IL & WI
Need storm damage help?
Allied Emergency Services — Licensed IL & WI Storm Damage Specialists
For 27 years, Allied has been restoring storm damage across Illinois and Wisconsin. IICRC-certified, EPA Lead-Safe, IL Licensed Roofing Contractor #104.019029. 24/7 emergency response.
Learn about our Storm Damage service →Free property assessment within 24 hours · No obligation · Insurance claim support