⚡ Storm or Roof Damage? Get a FREE Estimate
Text ESTIMATE to (844) 907-2546
Or call (800) 792-0212 for 24/7 emergency response
AI-powered • No obligation • Licensed IL & WI
Introduction
Rainstorms can inundate your home’s roof with water, posing a significant risk at roof-wall intersections. Installing step and kick-out flashing is vital to divert water away from these critical areas, preventing potential water damage and costly repairs. This blog post outlines best practices for installing step and kick-out flashing, especially in high-storm or hurricane-prone regions.
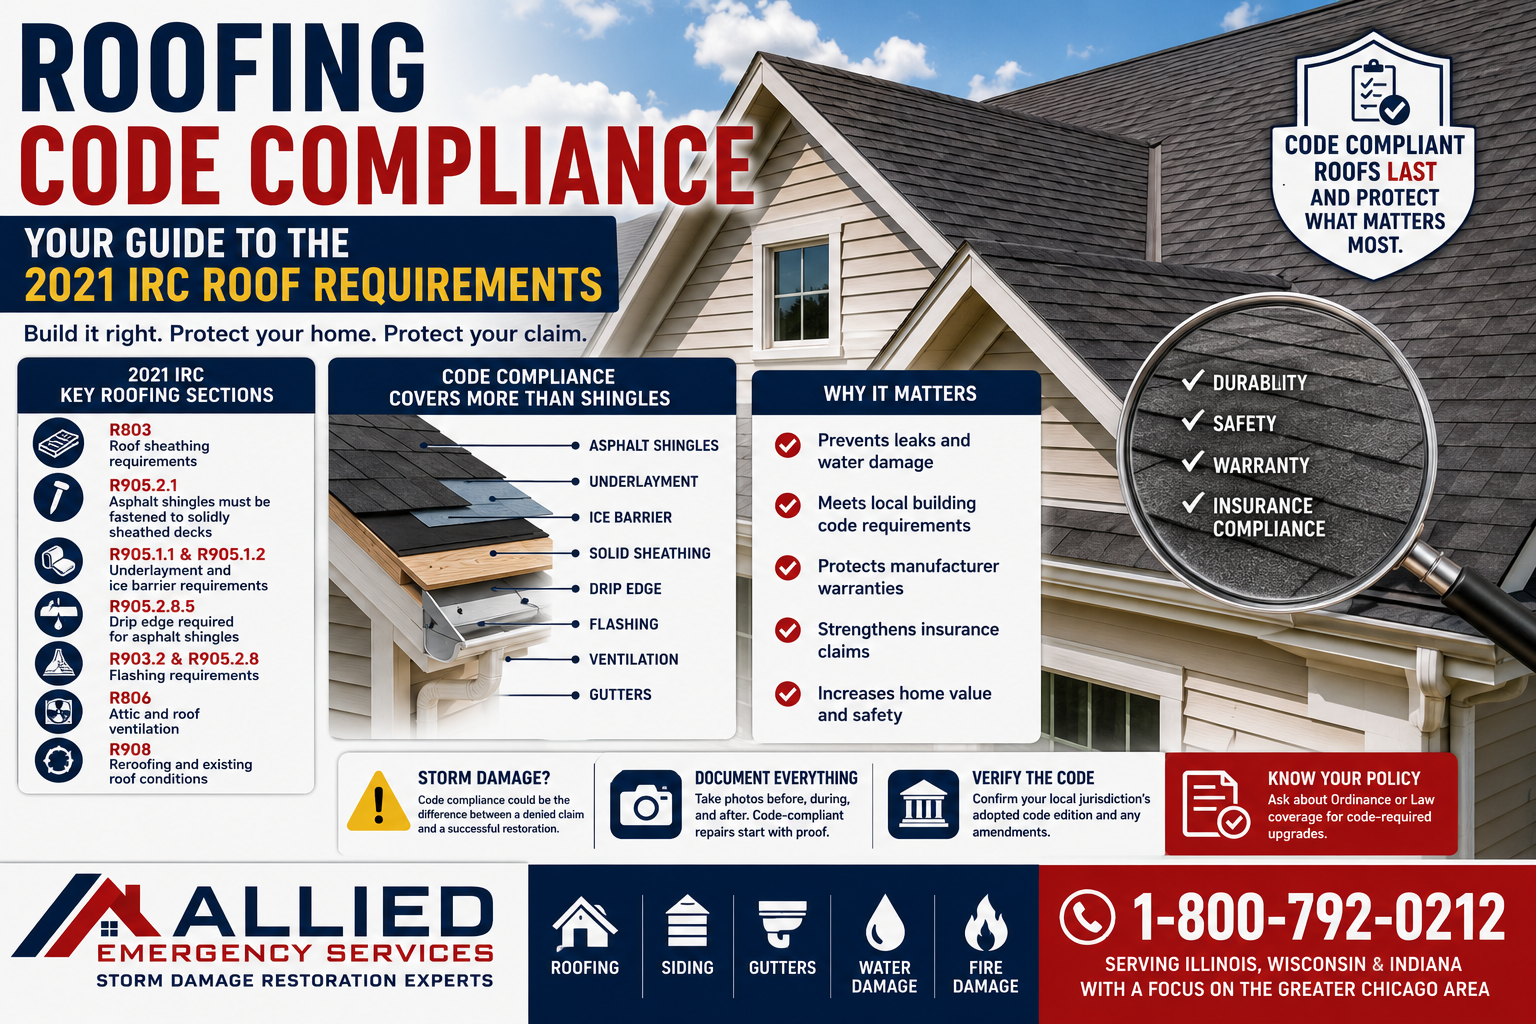
Importance of Proper Flashing
Inadequate or missing flashing at roof-wall intersections can lead to water intrusion, resulting in damage to wall sheathing, insulation, and even structural framing. Modern wall claddings can often mask the symptoms of water damage, making it even more crucial to install proper flashing systems from the outset.
Material Selection
- Opt for corrosion-resistant flashing.
- Ensure a minimum thickness of 0.019 inches for galvanized steel flashing.
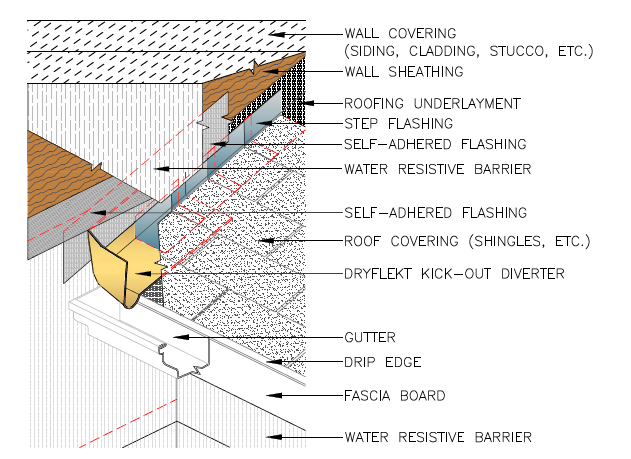
Installation Guidelines
Homes with Rigid Foam Insulation Sheathing
- Install drip edge and roofing underlayment, extending it 8 inches over the sidewall.
- Place a one-piece, non-corrosive kick-out diverter as the first piece of step flashing.
- Secure the diverter to the roof deck but not to the sidewall.
- Apply self-adhesive flashing and construction tape over the wall flashing and rigid foam insulation.
- Finish by installing the siding over the insulation.
Homes with House Wrap over OSB or Plywood
- Install drip edge and roofing underlayment, extending it 6 inches over the weather-resistive barrier.
- Install the kick-out diverter as described above.
- Apply self-adhesive flashing over the wall flashing and house wrap.
- Ensure the house wrap fits over the flashing and is installed in a shingle-fashion manner.
- Conclude by applying siding over the house wrap.
Compliance Summary for Flashing
- ENERGY STAR: Step and kick-out flashing required.
- DOE: ENERGY STAR certification necessary.
- IRC: Corrosion-resistant, shingle-fashion flashing.
- Florida Code: Corrosion-resistant gutter fasteners.
- AAMA 711-13: Standards for self-adhering flashing.
- Retrofit: Must comply with current IRC.
IRC Compliance for Flashing
- Section R703.8: Approved corrosion-resistant flashing applied in a shingle fashion.
- Section R903.2: Metal flashing must be at least 0.019 inches thick (26-gauge galvanized sheet).
- Section R102.7.1: Additions and repairs must conform to current IRC without affecting existing structures.
- Chapter 9, R903.2: Flashing at wall and roof intersections required; metal must be corrosion-resistant and at least 0.019 inches thick.
- Appendix J: Regulates repair and renovation for existing buildings.
Conclusion
Proper installation of step and kick-out flashing is not just a building code requirement but a vital component in safeguarding your home from water damage. Coordination between different trades, like roofers and siding installers, is key to maintaining a continuous and effective drainage plane.
For more personalized guidance, consult with engineers and local building codes specific to your location. For immediate service or consultation, you may contact us at Allied Emergency Services, INC.
Contact Information:
- Phone: 1-800-792-0212
- Email: Info@AlliedEmergencyServices.com
- Location: Serving Illinois, Wisconsin, and Indiana with a focus on the greater Chicago area.
If you require immediate assistance or have specific questions, our human support is readily available to help you.
Disclaimer: This article is intended for informational purposes only. For professional advice, consult experts in the field
⚡ Storm or Roof Damage? Get a FREE Estimate
Text ESTIMATE to (844) 907-2546
Or call (800) 792-0212 for 24/7 emergency response
AI-powered • No obligation • Licensed IL & WI
Need roofing help?
Allied Emergency Services — Licensed IL & WI Roofing Specialists
For 27 years, Allied has been building and restoring roofing across Illinois and Wisconsin. IICRC-certified, EPA Lead-Safe, IL Licensed Roofing Contractor #104.019029. 24/7 emergency response.
Learn about our Roofing service →Free property assessment within 24 hours · No obligation · Insurance claim support